Once the library is installed, let’s go with a very basic example using the Arduino ESP8266 library:
#include "abtoo.h"

int ledPin = 13; // GPIO13
char* ssid = "myhomessid";
char* password = "mywifipassword";
int h = LOW;

AbetooIno abtoino;

void messageReceived(String message)
{
 Serial.println(message);
 h = h^1;
 digitalWrite(ledPin, h?HIGH:LOW);

}

void setup() {
 Serial.begin(9600);
 delay(10);

 pinMode(ledPin, OUTPUT);
 digitalWrite(ledPin, LOW);

 // Connect to WiFi network
 Serial.println();
 Serial.println();
 Serial.print("Connecting to ");
 Serial.println(ssid);

 WiFi.begin(ssid, password);

 while (WiFi.status() != WL_CONNECTED) {
 delay(500);
 Serial.print(".");
 }
 Serial.println("");
 Serial.println("WiFi connected");

 String uuid = "uudi1";
 String channel = "-TbVO-rqdA0iWg6-gWh0eeQ636243460528994051"
 "#735acf9cd6eda96e66ee3858496dca59d750aff1";
 int heartbeat = 1; //minutes
 abtoino.init(uuid, channel, heartbeat, messageReceived);
}

void loop()
{
 abtoino.abetooloop();
}
Let’s check it out the code a little bit deeper.
The first step, before define our connection, is to establish a wifi/ethernet link, in this particular case, in the example above, a wifi connection procedure is used.
 // Connect to WiFi network
 Serial.println();
 Serial.println();
 Serial.print("Connecting to ");
 Serial.println(ssid);

 WiFi.begin(ssid, password);

 while (WiFi.status() != WL_CONNECTED) {
 delay(500);
 Serial.print(".");
 }
 Serial.println("");
 Serial.println("WiFi connected")
Within setup procedure, we have to define the connection parameters, there’re only 4 parameters. We have to introduce a valid channel id string, a heartbeat timeout in minutes, a unique identifier uuid across other connections to the same channel id and a function callback messageReceived to react to new messages.
 String uuid = "uudi1";
 String channel = "-TbVO-rqdA0iWg6-gWh0eeQ636243460528994051"
 "#735acf9cd6eda96e66ee3858496dca59d750aff1";
 int heartbeat = 1; // minutes
 abtoino.init(uuid, channel, heartbeat, messageReceived);
Once a new message arrives the function messageReceived is triggered, showing message content and flipping a led.
void messageReceived(String message)
{
 Serial.println(message);
 h = h^1;
 digitalWrite(ledPin, h?HIGH:LOW);

}
The other important part is to include a calling to the abetooloop function withing loop procedure,
void loop()
{
 abtoino.abetooloop();
}
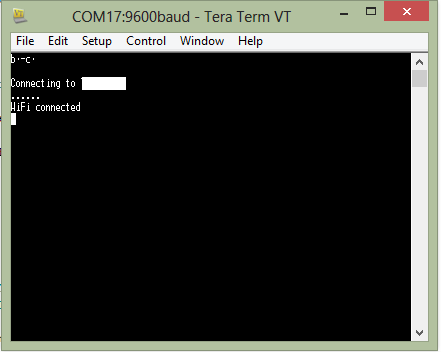
If you launch the code above, you’ll see something like this at the serial console,


Leave A Comment?